Sunday, July 4, 2010
Free Demo Sunday! How to Crochet a Necklace! Part 1
Part One!
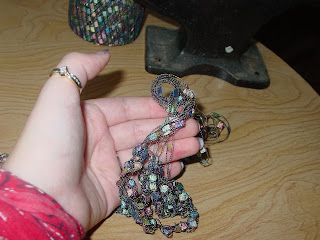
Here is the first part of the demo on how to create this beautiful sparkly crochet necklace. Crochet necklaces were the trend in the craft community for such a long time, so we're taking it to the next level by adding some metal and sparkle to it! The first part of this demo is just the basic crochet necklace. Check back next week for part two to learn how to crochet crystals onto the wire in a couple different ways and then weave the wires into the necklace.
Materials needed (part 1):
1 ball of ladder or ribbon yarn (or at least a good 10 yards)
Scissors
Size K/ 7mm crochet hook. (I prefer the Addi Bamboo because the hook is deep enough that it grabs both sides of the ladder yarn)
Tape Measure
Additional Materials needed (part 2):
28 or 26 gauge artistic wire (I used silver but choose whatever color you'd like)
At least 100 beads to add onto the wire (I think 4mm Swarovski crystal bicones look the best)
Wire Cutter
Cut five strands of the yarn that are two yards each. If you want a necklace much longer than 24 inches, you should add about a foot to the total length, or just add however much you think you'd like.
Starting with the first strand, measure 12 inches on the yarn.
Loop the yarn over itself to begin the chain stitch.
Insert your hook into the loop and pull the longer tail end up through the loop to start a slip knot.
Begin to chain stitch!
Crochet until you are 12 inches from the other end. You may want to do one or two more stitches than you think you'd need because when you pull out of the stitch, your tail end might get a little longer. :)
Pull the tail end all the way out of your last chain stitch.
Complete all of the strands in the same way!
Combine all five strands. Your chain sections should all be about the same length.
Measure 3 inches up from your chain sections and tie an overhand knot.
Do the same thing to the other side!
Make sure that your knots are about the same length from the chain sections on both sides. If they aren't, it's easy enough to loosen one and then slide it to where it needs to go.
Tie another overhand knot at the top of the necklace, and there you are! You've made your crocheted necklace! Slip it on over your head, and it should be the perfect length! If you'd prefer a clasp, just get a little crafty and tie your favorite style on at the right length for you. You could even knot both sides separately and tie your necklace on at the perfect length each time you wear it.
Stay tuned! Next week we'll add the sparkle!
Subscribe to:
Post Comments (Atom)


This is very unique and very nice. I wish to feature your page in our blog of there is an available slot.
ReplyDeleteDiybeadingclub.com
Diylessons.org
Handmade-Jewelry-Club.com
Where do you get the product at.
ReplyDeletePlease send me more of this.
ReplyDeleteDo you sell ? Do you do matching earrings? ?? Sassyluvsu@live.com
ReplyDeleteDo you have a tutorial for us knitters to do a scarf?
ReplyDelete